os8088 / Booting os8088
Running os8088
Put the desktop on your machine.
Run os8088 in an emulator, in your browser, or on real hardware. Start with the disk images, use an 86Box configuration, or build the system from source. The instructions below cover each route.
Try it in the browser
Below is a PC emulator that runs in the browser. It boots os8088 from a hard disk, drive C:, that carries the whole system and every program. The disk is fetched a piece at a time as the machine reads it, so the first boot downloads about 256KB. Files you save stay until you close the tab. The emulator supports sound. If audio is silent, click inside the screen to enable it.
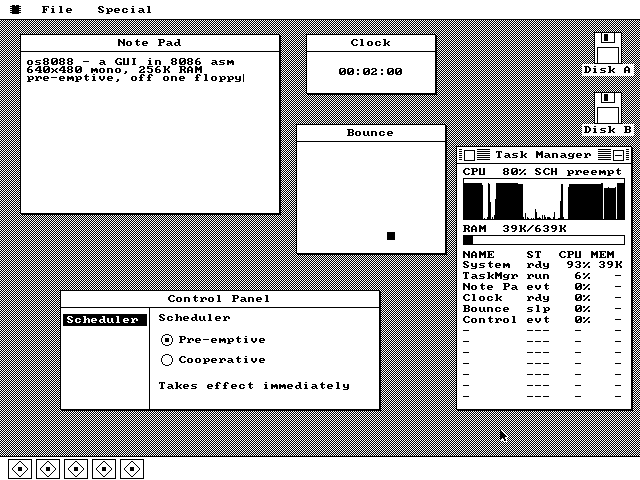
Not started.
Run it from source
The source code comes with 86Box configurations you can use on your Mac, Linux or Windows PC to run the operating system. You can see all the available configurations in the table further down this page.
If you want to go this route, start by cloning the repo using the following command:
git clone https://github.com/jggonz/os8088.gitIf you're on a Mac with an M chip, you can install the required tools (nasm, python3,
and qemu-system-i386) by running tools/setup-macos.sh which leverages Homebrew behind the scenes.
This script also fetches the 86Box ROM sets since those are not bundled with 86Box.
Now you can run the following make commands to run the various available configurations. Each one assembles the floppy images it needs, then launches 86Box:
XT Configurations
make xt | An IBM PC/XT, 8088 at 4.77MHz, 256KB, an Oak OTI-067 VGA card, and the two 360KB floppies in A: and B: |
|---|---|
make xt-640 | The same 8088 at 4.77Mhz, VGA, two 360KB floppies and 640KB of RAM |
make xt-cga | A 256KB XT with a CGA: 640x200, monochrome |
make xt-hercules | A 256KB XT with a Hercules: 720x348, monochrome |
make xt-multimon | A 640KB XT with a CGA and a Hercules Plus. 86Box opens a window per card. This setup allows for Dual Display mode to be enabled in the Control Panel |
make xt-sound | A 640KB XT with a Sound Blaster |
286, 386s, 486s and Pentiums
make 286 | AMI 286 clone board, 12.5MHz, 1MB, two 1.44MB drives |
|---|---|
make 286-sound | The same board with a Sound Blaster 16 in it |
make 386sx | Shuttle HOT-304, 386SX at 16MHz, 2MB |
make 386 | Micronics 386 board, 386DX at 25MHz, 2MB |
make 386-xms | The same board with 4MB. Task Manager's Memory view shows the XMS line |
make 386-sound | The 386DX/25 with a Sound Blaster 16 |
make 486 | AMI 486 board with the SiS 471 chipset, 486DX2 at 66MHz, 8MB, SB16 |
make pentium | ASUS P/I-P55TP4XE with the 430FX chipset, Pentium 133MHz, 16MB, SB16 |
Configurations for specific programs
The following configurations spin up an emulator and let you try some of the included apps:
make xt-word | Microsoft Word 1.1a XT w/8088-4.77MHz and 640KB RAM, a 720KB disk in B: containing Word 1.1 (Assembly version) |
|---|---|
make 386-word | The same Word disk on the 386DX/25, at 1.44MB. |
make 386-c-word | CWORD, the word processor written in C, on the 386DX/25. Needs the C compiler, which tools/setup-cc.sh fetches and builds. |
make xt-z | Frotz (Z-Machine emulator) on a 640KB XT with a Sound Blaster 2.0 and a 720KB story disk. |
make 386-z | Frotz on the 386DX/25 with an SB16 and the 1.44MB story library. |
make xt-runcpm, 286-runcpm, 386-runcpm | RunCPM, CP/M 2.2 on an emulated Z80 core. On an XT with an 8088 running at 4.77Mhz runs the Z80 at 0.22MHz. It's usable, but slow. |
make xt-c64, 286-c64, 386-c64 | The Commodore 64 emulator. It is only usable on 386 or faster PCs |
make xt-sound-1.44 | A 640KB XT with a Sound Blaster, booting the 360KB system disk with the first everything disk, apps-all-1.img, in a 1.44MB B: drive |
The Frotz and RunCPM disks are assembled from files you need to get by running
tools/getstories.py and tools/getruncpm.py
Writing to real media
If you have a real XT, you want the 360KB images: os8088-360.img for
drive A: and apps360.img for drive B:. Write them to double-density 5.25"
disks with dd, one disk at a time:
dd if=os8088-360.img of=/dev/fd0 bs=512Check the device name before you press Return.
dd writes to whatever you put after of= and asks no questions,
so name the wrong device and you lose that disk. Run diskutil list on macOS
or lsblk on Linux first, and unmount the drive before you write to it.
Use a genuine 360KB drive if you can. A 1.2MB drive can write these disks, but it writes thinner tracks, and period hardware often can't read them back. If your XT won't boot a disk that looks fine on your modern machine, that's usually why.
Put the boot disk in A: and the software disk in B: and switch the machine on. The software disk in B: is optional, but you'll probably want to try some of the apps.
On a Mac there is an easier way than dd: the disk imager, described next.
Writing media with the disk imager
The source tree ships a disk imager for macOS. It finds the drives you have plugged in, lists the images that fit each one, and writes the one you pick -- a floppy, a USB stick, a CD-R, or a CompactFlash card for an XT-class machine. It never writes until you have typed the target disk's identifier back at it, and it reads every byte back afterwards and compares checksums, so a stick or card that silently drops data is caught on your desk rather than at the machine.
Build the images first, then start it:
make          # the floppy images
make live     # the live USB image and live CD (needs the C compiler; it fetches it)
make imager   # scan the attached drives and choose what to write
If you downloaded a release
instead of building, point it at the unzipped folder:
python3 tools/os88imager.py --images ~/Downloads/os8088.
--scan lists devices and images and writes nothing.
| Medium | Plug in | What it writes |
|---|---|---|
| Floppy | A USB floppy drive with a disk in it. Most USB drives handle 1.44MB and 720KB; 360KB and 1.2MB need a drive macOS exposes at that capacity. | The floppy image whose size matches the disk exactly: os8088.img and apps.img for a 1.44MB pair, os8088-360.img and apps360.img for an XT. |
| USB stick | Any removable USB flash drive. | os8088-usb.img, the live disk. Boots a legacy-BIOS PC straight into the desktop with everything on drive C:. |
| CD-R | A CD burner. | os8088.iso, the live CD, burned and verified by macOS's own drutil. |
| CompactFlash card | The card in a USB card reader. | The same live image, rewritten for the geometry the card's BIOS reports. See below. |
CompactFlash cards, XTIDE and the Book8088
A CompactFlash card is how os8088 gets onto a Book8088, the 8088 laptop that
boots CompactFlash through the XTIDE Universal BIOS, and onto any XT with an XTIDE card.
There is one thing to know. A modern PC derives a drive's geometry from the image's own
partition table; an XTIDE BIOS reports the card's geometry instead. The live
image is laid out for 16 heads and 63 sectors per track, so on a card the BIOS sees
differently it answers Not bootable.
The imager asks one extra question when the target is a card reader: the heads and sectors the booting BIOS reports. For cards over about 500MB it suggests the answer, since XTIDE computes it from the card's size. For smaller cards the geometry is the card's own and you type it from the card's datasheet -- a 256MB SanDisk card, for example, reports 16 heads and 32 sectors, and a Book8088 boots the image written that way. The imager cannot read it itself, because a USB card reader does not pass the card's identity through. The image file on your Mac is not changed; the ten bytes that name a geometry are rewritten on the way to the card, and the checksum printed second is the one the read-back is checked against.
Only the first 32MB of the card is used. The rest is left alone. On other platforms,
or with dd, the same rewrite is one command:
python3 tools/os88disk.py --retarget os8088-usb.img --geometry 16/32 -o cf.imgThe imager only offers drives that could be the right answer. Internal disks, the disk macOS is running from, non-USB disks and read-only media are filtered out rather than warned about. The selected device is checked again before and after it is unmounted, and an identity change aborts the write.
Building from source
If you'd rather build the floppy images yourself instead of downloading them, clone
the repo and run make:
git clone https://github.com/jggonz/os8088.git
cd os8088
make
That puts the four core floppy images in build/, ready to mount in an
emulator or write to a real disk.
You'll need nasm, python3 and qemu-system-i386
installed first. On a Mac, tools/setup-macos.sh installs them for you.
86Box is optional, and only needed if you want to run the machine configurations above.
A few other targets worth knowing about:
make | Build the four core floppy images into build/. |
|---|---|
make worddisk | Build the Microsoft Word disk, in all three geometries. |
make cworddisk | Build the CWORD disk. Needs a C compiler, which tools/setup-cc.sh fetches and builds. |
make allapps | Build the everything disks, apps-all-1.img and on: every program, on as many floppies as it takes. Needs the C compiler too. |
make run | Boot the 1.44MB pair in QEMU with the emulated serial mouse attached. |
make test | Boot headless with a QMP control socket at build/qmp.sock, for scripted clicks and screendumps. |
make debug | Boot with QEMU halted, waiting for gdb on port 1234. |
make xt | Boot the 360KB pair in 86Box using vm/xt/86box.cfg. Twenty-five more 86Box machines sit beside it -- see the tables above. |
make clean | Remove build/. |
The kernel is compiled with a cpu 8086 directive to make sure that we
don't accidentally ship a kernel with assembly meant for newer chips and break XT
compatibility. The build also passes NASM -w+error, so a newer instruction
stops the build instead of slipping through as a warning.
Without that, you wouldn't find out until a real XT choked on it. So if the build works, it runs on an 8088.